日曜ITエンジニア劇場

日曜に勉強した情報の整理と、挑戦する新たな技術(私にとって)のつまづきポイントを綴っていきます。

PostgreSQLのCOPYコマンドをPythonで操ってみた

環境

Pythonバージョン:3.7.8
開発環境:Mac
Windowsであれば下記よりPythonインストーラーをダウンロードして環境構築する
Windows版Pythonのインストール - python.jp
※インストールが必要なライブラリ
* pandas
* psycopg2
<インストールの参考>
WindowsでPython3, numpy, pandas, matplotlibなどインストール - Qiita

目標

AccessのデータをPostgreSQLにデータ移行する

問題点

  • カラム内で改行している。
    テキストエディターの置換で正規表現を使って改行コードを「LF(\n)」に変換することもできるが、
    Pythonを使って業務ツール作った方が、DB接続もできるので便利。
    ↓↓↓
[解決策]
CSVでデータをエクスポートするとCSVのフォーマットが崩れるので、
JSONでエクスポートする。
  • カラム数が強烈に多すぎて1万件のinsertですら固まる。
    ↓↓↓
[解決策]
PostgreSQLの「COPY」コマンドを使う。

その他実現したいこと

準備

  1. DBアクセスツールを使用してJSON形式でエクスポートする。
  2. JSONのファイル名はインポート先のテーブル名を指定する。

実装したコード

CSV編集

import glob
import pathlib
import json
import pandas as pd
from collections import OrderedDict
from distutils.util import strtobool

# 【CSVファイル編集変換ツール】
#   <環境>
#    * 本プログラムのPythonのバージョン:3.7.8
#    * WindowsのPython環境構築
#    https://www.python.jp/install/windows/install.html
#   <実行前準備>
#   * DBアクセスツールからエクスポートするときの注意点
#     * JSONを選択する
#     * ファイル名はインポート先のテーブル名を指定する
#   * エクスポートしたファイルは本プログラムと同階層の「json」ディレクトリに配置する
#   <実行方法>
#   * コマンドプロンプトで本プログラムを格納しているパスに移動する
#     $ cd [配置したパス]/python_tool
#   * プログラムを実行する。
#     $ python edit_files.py 

# ★JSONで取り込む
#  1. [OK!]JSONデータを辞書型オブジェクトに変換する
#  https://qiita.com/ndj/items/c54a057a014b1977c538
def edit_file(file_name):
    d = {}
   # 下記encodingの指定はWindowsのみ(Macは不要)
    with open("./json/" + file_name, mode="r", encoding="utf-8") as f:
        # json.loadは列順が担保されないので下記引数が必要
        # https://note.nkmk.me/python-json-load-dump/
        d = json.load(f, object_pairs_hook=OrderedDict)
        # key = [k for k in d.keys()][0]
        # print(key)
        list_d = d[[k for k in d.keys()][0]]
        # データフレーム型で列順序保持する解決方法1. 辞書型に変換後に列順を保存
        # https://www.javadrive.jp/python/dictionary/index8.html#section1
        keys = list(list_d[0].keys())
        
    #  2. 下記2種類の三項演算子との組み合わせのリスト内包表記(1行でループ記述できる)でデータを編集する。
    # https://note.nkmk.me/python-list-comprehension/
        esc_dic_list = []
        for dic in list_d:
            for t in dic.items():
                #    a. カラム内の改行コードを「\\n」に変換する...JSONで出力すると「\n」になっているが、
                #       このままCSVに出力すると改行してしまうので「\\n」とエスケープする必要がある。
                if type(t[1]) is str:
                    dic[t[0]] = t[1].replace("\r", "")
                    dic[t[0]] = dic[t[0]].replace("\n", "\\n")
                    dic[t[0]] = dic[t[0]].rstrip(" ")
                # bool型の「true」「false」を「'1'」「'0'」に変換する
                elif type(t[1]) is bool:
                    dic[t[0]] = '1' if t[1] else '0'
                # 後ほど処理するデータフレームがint型(整数)を自動で小数桁を付加してしまうので、
                # int型はstr型に変換する
                # (CSVに出力した時、引用符が付かないのでDBのCOPYコマンドを使用する際数値として扱ってもらえる)
                elif type(t[1]) is int:
                    dic[t[0]] = str(t[1])
        # print(list_d)

    #  3. 辞書型オブジェクトをCSVデータに変換する。
        # 辞書リストをデータフレーム型に変換
        # https://atsashimipy.hatenablog.com/entry/2019/05/16/150303
        # print(pd.options.display.precision)
        # https://note.nkmk.me/python-pandas-json-normalize/
        # df = pd.io.json.json_normalize(list_d)
        df = pd.json_normalize(list_d)
        # print("辞書型をデータフレーム型に変換")

        # 解決方法2.列順を指定する
        # https://note.nkmk.me/python-pandas-reindex/
        df_reindex = df.reindex(columns=keys)
        # print(df_reindex)
        # データフレーム型をCSVに変換
        # ※ヘッダー とindexなしにする
        # https://note.nkmk.me/python-pandas-to-csv/
        # print('***引数のファイル名を編集***')
        print(file_name.replace('.json', '.csv'))
        df_reindex.to_csv('./csv/' + file_name.replace('.json', '.csv'), header=False, index=False)

# ★ファイル名のみ取得
# print('**************')
# print('ファイル名のみ取得:')
files = pathlib.Path('./json/').glob('*.json')
for file in files:
    edit_file(file.name)
    

# ******【参考】*********
# ★CSVファイルだと1カラム内に改行が入っているとそのまま改行してしまい使えなかった。
#   ->JSONファイルでエクスポートすると改行は「\n」で表現されていたので、JSONでのエクスポートを採用した。
# ・行をすべて読み込む
# https://qiita.com/Cesaroshun/items/b331844a54d3618c4c3a
# print('**************')
# print('tables_of_various_types.csvの中身:')
# with open('./csv/tables_of_various_types.csv', mode='r', encoding='utf-8') as f:
#     i = 0
#     for line in f:
#         i = i + 1
#         print(i)
#         print('行目')
#         print(line)

# ★データフレーム型は列の順序を指定しないとアルファベット順になる


# ★path+ファイル名取得
# print('**************')
# print('path+ファイル名取得:')
# files = glob.glob('./json/*')
# for file in files:
#     edit_file(file)

PostgreSQLCSVファイルをCOPYコマンドでインポート

import glob
import pathlib
import psycopg2
from psycopg2.extras import DictCursor

# DB接続
def get_connection():
    return psycopg2.connect("dbname='[DB名]' host='[host名またはhostのIPアドレス]' user='[DBのuser]' password='[DBのpassword]'")

# DBインポート処理
def db_import(file_name):
    print(file_name)
    table_name = file_name.replace('.csv','')
    print(table_name)
    # 該当テーブルの登録前件数表示
    with get_connection() as conn:
        with conn.cursor(cursor_factory=DictCursor) as cur:
            cur.execute('SELECT COUNT(*) AS count FROM ' + table_name)
            row = cur.fetchone()
            print('登録前の件数:')
            print(row)

    # インポートするファイルの件数表示
    print('ファイルの件数:')
    # リスト内包表記
    # https://note.nkmk.me/python-list-comprehension/
    print(sum([1 for _ in open('./csv/' + file_name, encoding="utf-8")]))

    col_names = []

    with get_connection() as conn:
        with conn.cursor(cursor_factory=DictCursor) as cur:
            # cur.execute("SELECT column_name from information_schema.columns where table_name = 'tables_of_various_types' ORDER by ordinal_position")
            cur.execute('SELECT * FROM ' + table_name)
            col_names = [col.name for col in cur.description]
            # id列を削除(現在serial型にしているから除外)
            col_names.pop(0)

    #COPYの実行
    with get_connection() as conn:
        with conn.cursor(cursor_factory=DictCursor) as cur:
            with open('./csv/' + file_name, mode='r', encoding='utf-8') as f:
                print(col_names)
                cur.copy_from( f , table_name, sep=',', null='',columns=(col_names))
                
        # sep='デリミッタ文字種:例ではTAB記号'
        # null='ヌル文字種:例ではNULL'...本プログラムでは''にした。
        #  columns=('') 入力対象のカラム名を順番に列挙、全カラムに投入を可能な場合は省略可能
    with get_connection() as conn:
        with conn.cursor(cursor_factory=DictCursor) as cur:
            cur.execute('SELECT COUNT(*) AS count FROM ' + table_name)
            row = cur.fetchone()
            print('登録後の件数:')
            print(row)
        
        print("OK!")

# ★CSVファイルある分だけインポート処理
files = pathlib.Path('./csv/').glob('*.csv')
for file in files:
    db_import(file.name)

SSH公開鍵の登録(ssh-copy-idコマンド)


参考資料

blog.apar.jp


ありがとうございます!
シンプルで分かりやすい記事だったので
すんなり作業が完了しました🙇🏻‍♀️


作業環境

接続元

$ sw_vers  
ProductName:    Mac OS X  
ProductVersion: 10.15.4  

接続先

$ cat /etc/redhat-release   
CentOS Linux release 8.1.1911 (Core)   

手順

1.Homebrewでssh-copy-idをインストールする。

brew install ssh-copy-id  

2. SSH鍵を生成する。

$ ssh-keygen -t rsa -b 4096  
Generating public/private rsa key pair.  
Enter file in which to save the key (/Users/[user_name]/.ssh/id_rsa):   
Enter passphrase (empty for no passphrase):   
Enter same passphrase again:   
Your identification has been saved in /Users/[user_name]/.ssh/id_rsa.  
Your public key has been saved in /Users/[user_name]/.ssh/id_rsa.pub.  
The key fingerprint is:  
SHA256:u+eDgIQBy51mfyEJU6YlP0Yz2v/l1EykfwotqvX+wkQ [user_name]@[user_name]noMacBook-Air.local  
The key's randomart image is:  
+---[RSA 4096]----+  
|.. +.B       .   |  
|..o & +     o    |  
|.. X B .   . .   |  
|  + + + .  E*    |  
|   . o oS .= = . |  
|    . o ..=.o o  |  
|       ..=o. .   |  
|        +.+o     |  
|       ..oo+o.   |  
+----[SHA256]-----+  
  

3.SSH鍵を任意のディレクトリに移動する。

※単なる整理整頓なので、この手順は飛ばしても構わない。

$ mkdir ~/.ssh/virtual_box  
$ mv ~/.ssh/id_rsa ~/.ssh/virtual_box/  
$ mv ~/.ssh/id_rsa.pub ~/.ssh/virtual_box/  
$ ls -la ~/.ssh/virtual_box/  
total 16  
drwxr-xr-x   4 [user_name]  staff   128  6  7 13:15 .  
drwx------  11 [user_name]  staff   352  6  7 13:15 ..  
-rw-------   1 [user_name]  staff  3414  6  7 13:13 id_rsa  
-rw-r--r--   1 [user_name]  staff   768  6  7 13:13 id_rsa.pub  

4.SSH公開鍵を接続先に登録する。

$ ssh-copy-id -p [ポート番号] -i ~/.ssh/virtual_box/id_rsa.pub [user_name]@[接続先のIPアドレスまたはホスト名]  
/usr/bin/ssh-copy-id: INFO: Source of key(s) to be installed: "/Users/naitoukazue/.ssh/virtual_box/id_rsa.pub"  
/usr/bin/ssh-copy-id: INFO: attempting to log in with the new key(s), to filter out any that are already installed  
/usr/bin/ssh-copy-id: INFO: 1 key(s) remain to be installed -- if you are prompted now it is to install the new keys  
[user_name]@[接続先のIPアドレスまたはホスト名]'s password:   
  
Number of key(s) added:        1  
  
Now try logging into the machine, with:   "ssh -p '[ポート番号]' '[user_name]@[接続先のIPアドレスまたはホスト名]'"  
and check to make sure that only the key(s) you wanted were added.  

5.接続を確認してみる。

$ ssh -p [ポート番号] [user_name]@[接続先のIPアドレスまたはホスト名]  
[user_name]@[接続先のIPアドレスまたはホスト名]'s password:   
Permission denied, please try again.  
[user_name]@[接続先のIPアドレスまたはホスト名]'s password:   
Activate the web console with: systemctl enable --now cockpit.socket  
  
Last failed login: Sun Jun  7 14:11:51 JST 2020 from 192.168.0.2 on ssh:notty  
There was 1 failed login attempt since the last successful login.  
Last login: Sun Jun  7 12:45:06 2020 from 192.168.0.2  
[[user_name]@localhost ~]$   

できました😊

ActiveAdmin/レシピ管理/開発


参考資料

1.公式サイト

activeadmin.info

2.作業手順参考

qiita.com
今回もありがとうございます!

3.ER図作成ツール(ブラウザで使用できる)

◆使用説明

www.kaasan.info

  ↑ ITかあさん、ありがとうございます!めっちゃ、便利です😊

◆ツール

ondras.zarovi.cz


目的

ActiveAdmin/レシピ管理/概要のER図を元に、
アプリをActiveAdminの機能だけで作る。


ER図

f:id:kuroneko-r011117:20200529121954p:plain

手順

1.modelを生成する。

# レシピ詳細model  
$ rails g model recipe_detail name:string deleted_at:datetime  
# 食材model  
$ rails g model ingredient name:string deleted_at:datetime  
# 調味料model  
$ rails g model seasoning name:string deleted_at:datetime  
# 単位model  
$ rails g model ingredient name:string deleted_at:datetime  

2.マイグレーションファイルをDBに反映

$ rails db:migrate    

3.アソシエーションの設定と外部キーの定義

レシピ詳細

app/models/recipe_detail.rb

class RecipeDetail < ApplicationRecord  
  belongs_to :recipe  
  belongs_to :ingredient  
  belongs_to :seasoning  
  belongs_to :unit  
    
  # ↓論理削除↓  
  acts_as_paranoid  
end  

<<未来の私に伝言>>
レシピ詳細は論理削除不要かも。必要なかったら、後日削除する。

食材

app/models/ingredient.rb

class Ingredient < ApplicationRecord  
  belongs_to :recipe_detail  
  
  # ↓論理削除↓  
  acts_as_paranoid  
end  

調味料

app/models/seasoning.rb

class Seasoning < ApplicationRecord  
  belongs_to :recipe_detail  
  
  # ↓論理削除↓  
  acts_as_paranoid  
end  

単位

app/models/unit.rb

class Unit < ApplicationRecord  
  belongs_to :recipe_detail  
    
  # ↓論理削除↓  
  acts_as_paranoid  
end  

レシピ(前回作ったものも忘れずに)

app/models/recipe.rb

class Recipe < ApplicationRecord
  has_many :recipe_details
  
  # ↓論理削除↓  
  acts_as_paranoid
end

4.前述までのmodelに対応する画面を作成する。

$ rails g active_admin:resource RecipeDetail  
$ rails g active_admin:resource Ingredient  
$ rails g active_admin:resource Seasoning  
$ rails g active_admin:resource Unit  

5.ActiveAdmin.registerpermit_paramsを記述する。

※生成したActiveAdmin.registerにはコメントとしてpermit_params
使用説明+全カラムに対応する記述があるので、不要な部分を削除するだけで良い。

レシピ詳細

app/admin/recipe_details.rb

ActiveAdmin.register RecipeDetail do  
  permit_params :quantity, :deleted_at, :recipe_id, :ingredient_id, :seasoning_id, :unit_id  
end  

食材

app/admin/ingredients.rb

ActiveAdmin.register Ingredient do  
  permit_params :name, :deleted_at    
end  

調味料

app/admin/seasonings.rb

ActiveAdmin.register Seasoning do  
  permit_params :name, :deleted_at  
end  

単位

app/admin/units.rb

ActiveAdmin.register Unit do  
  permit_params :name, :deleted_at  
end  

5.サーバー起動

$ rails s    

6.ブラウザでhttp://localhost:3000/adminにアクセスして、ログインする。

おまけ

完成図

とりあえず、レシピ詳細画面だけ掲載します。
他は前回のrecipesと似た様なものなので。

f:id:kuroneko-r011117:20200529134556p:plain
レシピ詳細_一覧画面

f:id:kuroneko-r011117:20200529134601p:plain
レシピ詳細_登録画面

f:id:kuroneko-r011117:20200529134605p:plain
レシピ詳細登録画面ドロップボックスをクリックした状態

 ↑
外部参照したところ(材料や調味料)は、自力でドロップボックス設置するのかと思いきや、
下図の通り、ActiveAdminが設置してくれている。
素晴らしい〜😂

ActiveAdmin/レシピ管理/概要


参考資料

1.公式サイト

https://activeadmin.info/0-installation.html

2.作業手順参考

https://qiita.com/enomotodev/items/5f6d9348207124a41bf9

今回もありがとうございます!
公式サイトで一番分かりずらかったのが、ActiveAdminに管理画面を追加する方法でした。
助かりました🙇🏻‍♀️


目的と動機

クックパッドさんで掲載されている方々から教えてもらったレシピであれば
クックパッドさんのアプリを使えるが、自分の家の味
(母は教えるのが下手なので、自分の舌で探し当てたご先祖の味)
を十数年前から書き溜めていたので、Excelで管理していた。
どこに保管したかをいつも迷っていた。DropBoxか? GoogleDriveか?
両方に『料理』フォルダがあって、毎回、当て物状態で微妙に時間を費やされるのが嫌だった。
今回、ActiveAdminの様な非常に便利なGemに出会い、
復習がてら自分で作ってみようと思う。
一人アジャイルでアプリを育てるのも目標の一つ。


環境

$ sw_vers  
ProductName:    Mac OS X  
ProductVersion: 10.15.4  
$ sqlite3 -version  
3.28.0    
$ ruby -v  
ruby 2.6.2p47 (2019-03-13 revision 67232) [x86_64-darwin19]  
$ rails -v  
Rails 6.0.3.1  

ER図

f:id:kuroneko-r011117:20200529121954p:plain

次回予告

ER図のアプリを作ります!
まずは前回2回の記事を踏襲して飾りっ気なしに忠実に作ります!
これから、レシピを探す手間が省ける😂

ActiveRecord覚書/論理削除(paranoia)


参考資料

1.手順とGemについて

qiita.com

 ↑
ありがとうございます!
あまりの便利さに驚愕しました🤩
論理削除のGem必ずあると信じてたら、やっぱりあった!!

2.公式サイト

github.com

3.RubyGems.org

rubygems.org


目的、動機

「マスタテーブルを作るのなら、論理削除したい!」
と思い立ち、Gemを調べたところ今回のparanoiaに辿り着いた。


環境

$ sw_vers  
ProductName:    Mac OS X  
ProductVersion: 10.15.4  
$ sqlite3 -version  
3.28.0    
$ ruby -v  
ruby 2.6.2p47 (2019-03-13 revision 67232) [x86_64-darwin19]  
$ rails -v  
Rails 6.0.3.1  

手順

1.Gemfileにparanoiaを追記して、インストール。

1−1.Gemfileに追記

※バージョン等詳細については参考資料3を参照
Gemfile

# 論理削除  
gem 'paranoia', '~> 2.4', '>= 2.4.2'  

1−2.インストール

bundle install  

2.modelを生成する。

※既存のmodelに追加する方法は参考資料1を参照ください。

$ rails g model recipe name:string deleted_at:datetime  
Running via Spring preloader in process 2887  
      invoke  active_record  
      create    db/migrate/20200526035626_create_recipes.rb  
      create    app/models/recipe.rb  
      invoke    rspec  
      create      spec/models/recipe_spec.rb  

3.マイグレーションファイルをDBに反映

$ rails db:migrate  
== 20200526035626 CreateRecipes: migrating ====================================  
-- create_table(:recipes)  
   -> 0.0026s  
== 20200526035626 CreateRecipes: migrated (0.0029s) ===========================  

4.生成したmodelにacts_as_paranoidを追記する。

app/models/recipe.rb

class Recipe < ApplicationRecord  
  acts_as_paranoid  
end  

5.コンソールで動作確認

# データを変数に格納  
irb(main):001:0> recipe = Recipe.first  
   (2.1ms)  SELECT sqlite_version(*)  
  Recipe Load (1.3ms)  SELECT "recipes".* FROM "recipes" WHERE "recipes"."deleted_at" IS NULL ORDER BY "recipes"."id" ASC LIMIT ?  [["LIMIT", 1]]  
=> #<Recipe id: 2, name: "肉じゃが", deleted_at: nil, created_at: "2020-05-26 04:28:27", updated_at: "2020-05-26 04:28:27">  
  
irb(main):002:0> recipe  
=> #<Recipe id: 2, name: "肉じゃが", deleted_at: nil, created_at: "2020-05-26 04:28:27", updated_at: "2020-05-26 04:28:27">  
  
# `destroy`で論理削除  
irb(main):003:0> recipe.destroy  
   (0.2ms)  begin transaction  
  Recipe Update (0.6ms)  UPDATE "recipes" SET "deleted_at" = ?, "updated_at" = ? WHERE "recipes"."id" = ?  [["deleted_at", "2020-05-26 04:36:57.646671"], ["updated_at", "2020-05-26 04:36:57.646732"], ["id", 2]]  
   (2.0ms)  commit transaction  
=> #<Recipe id: 2, name: "肉じゃが", deleted_at: "2020-05-26 04:36:57", created_at: "2020-05-26 04:28:27", updated_at: "2020-05-26 04:36:57">  
  
# `only_deleted`で論理削除中のデータを確認できる  
irb(main):005:0> Recipe.only_deleted  
  Recipe Load (0.4ms)  SELECT "recipes".* FROM "recipes" WHERE "recipes"."deleted_at" IS NOT NULL LIMIT ?  [["LIMIT", 11]]  
=> #<ActiveRecord::Relation [#<Recipe id: 2, name: "肉じゃが", deleted_at: "2020-05-26 04:36:57", created_at: "2020-05-26 04:28:27", updated_at: "2020-05-26 04:36:57">]>  
  
# `restore`で論理削除を解除  
irb(main):006:0> recipe.restore  
   (0.1ms)  begin transaction  
  Recipe Update (0.4ms)  UPDATE "recipes" SET "deleted_at" = ?, "updated_at" = ? WHERE "recipes"."id" = ?  [["deleted_at", nil], ["updated_at", "2020-05-26 04:38:00.042295"], ["id", 2]]  
   (1.8ms)  commit transaction  
=> #<Recipe id: 2, name: "肉じゃが", deleted_at: nil, created_at: "2020-05-26 04:28:27", updated_at: "2020-05-26 04:38:00">  
  
# 普通に一番目のデータを取得すると。。。取得できている!  
irb(main):007:0> Recipe.first  
  Recipe Load (0.4ms)  SELECT "recipes".* FROM "recipes" WHERE "recipes"."deleted_at" IS NULL ORDER BY "recipes"."id" ASC LIMIT ?  [["LIMIT", 1]]  
=> #<Recipe id: 2, name: "肉じゃが", deleted_at: nil, created_at: "2020-05-26 04:28:27", updated_at: "2020-05-26 04:38:00">  

ActiveAdmin/modelおよび管理画面の追加


参考資料

1.公式サイト

activeadmin.info

2.作業手順参考

qiita.com

今回もありがとうございます!
公式サイトで一番分かりずらかったのが、ActiveAdminに
管理画面を追加する方法でした。
助かりました🙇🏻‍♀️


環境

$ sw_vers  
ProductName:    Mac OS X  
ProductVersion: 10.15.4  
$ sqlite3 -version  
3.28.0    
$ ruby -v  
ruby 2.6.2p47 (2019-03-13 revision 67232) [x86_64-darwin19]  
$ rails -v  
Rails 6.0.3.1  

手順

1.modelを生成する。

(delete_atカラムについては、ActiveRecordで論理削除を参照ください。)

$ rails g model recipe name:string deleted_at:datetime  
Running via Spring preloader in process 2887  
      invoke  active_record  
      create    db/migrate/20200526035626_create_recipes.rb  
      create    app/models/recipe.rb  
      invoke    rspec  
      create      spec/models/recipe_spec.rb  

2.マイグレーションファイルをDBに反映

$ rails db:migrate  
== 20200526035626 CreateRecipes: migrating ====================================  
-- create_table(:recipes)  
   -> 0.0026s  
== 20200526035626 CreateRecipes: migrated (0.0029s) ===========================  

3.手順1で生成したmodelに対する画面を生成する。

$ rails g active_admin:resource Recipe  
Running via Spring preloader in process 3057  
      create  app/admin/recipes.rb  

4.app/admin/recipes.rbにpermit_paramsを記述する。

permit_paramsは、ストロングパラメータの様なもの。
 許可するパラメータを制限する。

recipes.rb

permit_params :name, :deleted_at  

※生成したファイルには、下記の様に自動で全項目に対してpermit_paramsの記述方法が記載されているので、
 必要な部分をコメントアウトして不要行を削除する方が効率がいいかもしれません。

ActiveAdmin.register Recipe do  
  
  # See permitted parameters documentation:  
  # https://github.com/activeadmin/activeadmin/blob/master/docs/2-resource-customization.md#setting-up-strong-parameters  
  #  
  # Uncomment all parameters which should be permitted for assignment  
  #  
  # permit_params :name, :deleted_at  
  #  
  # or  
  #  
  # permit_params do  
  #   permitted = [:name, :deleted_at]  
  #   permitted << :other if params[:action] == 'create' && current_user.admin?  
  #   permitted  
  # end  
  
end  

5.サーバー起動

$ rails s  

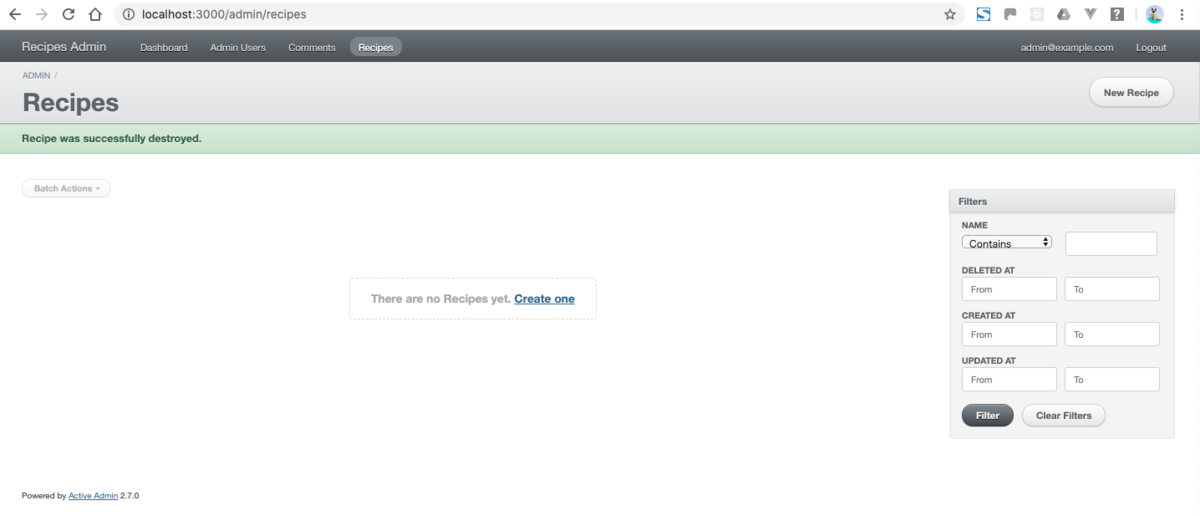
おまけ

完成図

f:id:kuroneko-r011117:20200526181505p:plain
一覧画面
f:id:kuroneko-r011117:20200526181631p:plain
新規登録画面
f:id:kuroneko-r011117:20200526181713p:plain
登録後の詳細画面
f:id:kuroneko-r011117:20200526181828p:plain
登録後の一覧画面

ActiveAdmin/導入からデフォルト状態で実行まで


参考資料

1.公式サイト

activeadmin.info

2.作業手順の参考

qiita.com
ありがとうございます!分かりやすかったです🙇🏻‍♀️
次回も、お世話になります🙇🏻‍♀️🙇🏻‍♀️

環境

$ sw_vers  
ProductName:    Mac OS X  
ProductVersion: 10.15.4  
$ sqlite3 -version  
3.28.0    
$ ruby -v  
ruby 2.6.2p47 (2019-03-13 revision 67232) [x86_64-darwin19]  
$ rails -v  
Rails 6.0.3.1  

手順

※1.と2.は通常のRailsプロジェクトの作成および準備手順。
自分向けに何度もあっちこっちで記述しています。
「これぐらい、知ってますがなー🤨」 という方は、
手順3からどうぞ💁‍♀️

1.プロジェクトを生成する

$ rails new recipes_admin  

2.gitの初期化(ローカル設定)

2−1.Github等の使用するサイトでリポジトリを作成する

2−2.remote.origin.urlの設定

Bitbucketまたはgithubのクローンの作成でremote.origin.url[※1]をコピーする。

cd [該当プロジェクトのパス]  
git remote add origin git@[※1]  

設定を確認する。

$ git config --local remote.origin.url  
git@bitbucket.org:xxxx.git  

2−3.gitの初期化

$git init

3.GemfileにActiveAdmin関連のGemを追記

# ActiveAdmin  
gem 'devise'  
gem 'activeadmin'  

4.3.のGemをインストール

$ bundle install  

5.ActiveAdminのコアファイルを生成する。

※下記デフォルトで実行したが、参考資料1.は他に
Deviseを使用したくない場合既存のユーザークラスを使用する場合がある。

$ rails g active_admin:install  
Running via Spring preloader in process 7958  
      invoke  devise  
    generate    devise:install  
      create    config/initializers/devise.rb  
      create    config/locales/devise.en.yml  
  ===============================================================================  
  
Some setup you must do manually if you haven't yet:  
  
  1. Ensure you have defined default url options in your environments files. Here  
     is an example of default_url_options appropriate for a development environment  
     in config/environments/development.rb:  
  
       config.action_mailer.default_url_options = { host: 'localhost', port: 3000 }  
  
     In production, :host should be set to the actual host of your application.  
  
  2. Ensure you have defined root_url to *something* in your config/routes.rb.  
     For example:  
  
       root to: "home#index"  
  
  3. Ensure you have flash messages in app/views/layouts/application.html.erb.  
     For example:  
  
       <p class="notice"><%= notice %></p>  
       <p class="alert"><%= alert %></p>  
  
  4. You can copy Devise views (for customization) to your app by running:  
  
       rails g devise:views  
  
===============================================================================  
      invoke    active_record  
      create      db/migrate/20200525092740_devise_create_admin_users.rb  
      create      app/models/admin_user.rb  
      invoke      test_unit  
      create        test/models/admin_user_test.rb  
      create        test/fixtures/admin_users.yml  
      insert      app/models/admin_user.rb  
       route    devise_for :admin_users  
        gsub    app/models/admin_user.rb  
        gsub    config/routes.rb  
      append    db/seeds.rb  
      create  config/initializers/active_admin.rb  
      create  app/admin  
      create  app/admin/dashboard.rb  
      create  app/admin/admin_users.rb  
      insert  config/routes.rb  
    generate  active_admin:assets  
       rails  generate active_admin:assets  
Running via Spring preloader in process 7984  
      create  app/assets/javascripts/active_admin.js  
      create  app/assets/stylesheets/active_admin.scss  
      create  db/migrate/20200525092753_create_active_admin_comments.rb  

6.5.で生成されたデフォルトのマイグレーションファイルをDBに反映する。

6−1.ActiveAdminのデフォルトのテーブル作成

$ rails db:migrate  
== 20200525092740 DeviseCreateAdminUsers: migrating ===========================  
-- create_table(:admin_users)  
   -> 0.0033s  
-- add_index(:admin_users, :email, {:unique=>true})  
   -> 0.0016s  
-- add_index(:admin_users, :reset_password_token, {:unique=>true})  
   -> 0.0026s  
== 20200525092740 DeviseCreateAdminUsers: migrated (0.0078s) ==================  
  
== 20200525092753 CreateActiveAdminComments: migrating ========================  
-- create_table(:active_admin_comments)  
   -> 0.0087s  
-- add_index(:active_admin_comments, [:namespace])  
   -> 0.0061s  
== 20200525092753 CreateActiveAdminComments: migrated (0.0154s) ===============  

6−2.ActiveAdminのUserテーブルに初期値を登録する。(db/seeds.rb)

$ rails db:seed  

上記のデータを確認してみる。

$ rails c  
Running via Spring preloader in process 8217  
Loading development environment (Rails 6.0.3.1)  
irb(main):002:0> AdminUser.all  
   (2.6ms)  SELECT sqlite_version(*)  
  AdminUser Load (1.5ms)  SELECT "admin_users".* FROM "admin_users" LIMIT ?  [["LIMIT", 11]]  
=> #<ActiveRecord::Relation [#<AdminUser id: 1, email: "admin@example.com", created_at: "2020-05-25 09:37:41", updated_at: "2020-05-25 09:37:41">]>  

入ってます👌

7.ブラウザで確認する。

7−1.いつも通りコンソールでサーバー起動。

$ rails s  

7−2.ブラウザを起動して、下記にアクセス。

http://localhost:3000/admin  

f:id:kuroneko-r011117:20200525192219p:plain
ActiveAdmin_ログイン画面

7−3.デフォルトのアカウントでログインする。

User: admin@example.com  
Password: password  

【おまけ】ログイン後の画面はこちら↓

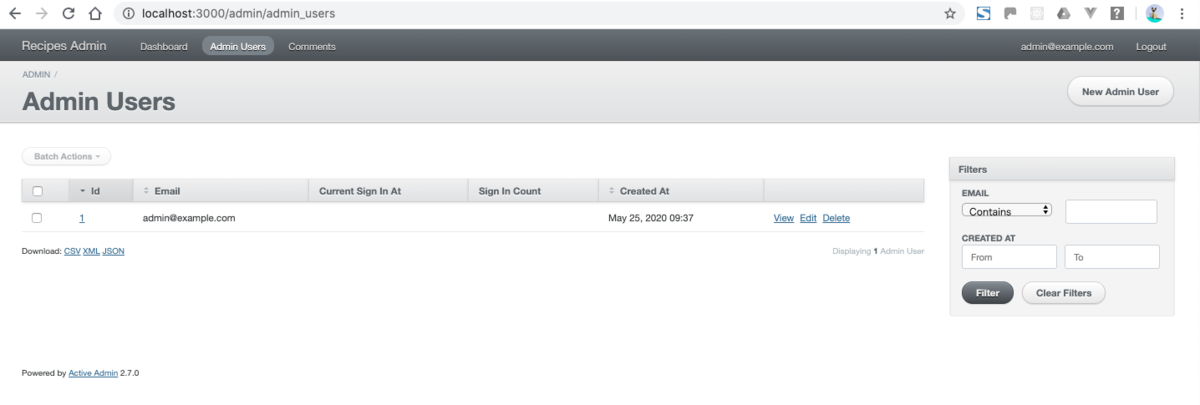
f:id:kuroneko-r011117:20200525192439p:plain
ActiveAdminログイン直後
f:id:kuroneko-r011117:20200525192619p:plain
ActiveAdminデフォルトのUser管理画面